Bangerhead Salt water spray for texture in the hair

7

Salt water spray is a spray that is mainly used to get puffy beach curls, and what it does is change the texture of the hair to a little more rough and salty - as if you have taken a dip in the sea and let it dry itself on the beach!

* Spray in salt water spray on damp hair.
* Massage it into the strands, and squeeze the hair for a more wavy result.
* Let the hair dry itself.

På detta sätt får håret en vågig och lite “slarvig” känsla vilket är riktigt snyggt på sommaren, både till vardags och fest!

Salt water spray is also good if you have thin and fine hair that is difficult to shape, then the spray can help if, for example, you want to make a nice set. Good tips for those of you who are investing in a set for balls / students / graduations and things that are relevant this season :)

Jag har testat Bangerheads saltvattenspray “ On The Beach”Which is made from caring goji berries that have healing anti-aging effects, and I can really recommend it!

My hair (read hair extensions) is the opposite of such hair that needs salt water spray, so I always strive for as soft and smooth hair as possible.

So I can personally feel that salt water spray in general was not something for me, but the result was definitely such a salty texture you are looking for and the hair is really nice!

And above all, the spray smells so good that I want to eat my hair! Seriously, I want to pour the spray into a glass and drink in the sun! :) It smells sweet and fruity, some kind of candy I can not put my finger on. Absolutely wonderful!

On The Beach costs SEK 139 and is available HERE, they have free shipping too!


Two thumbs up :)

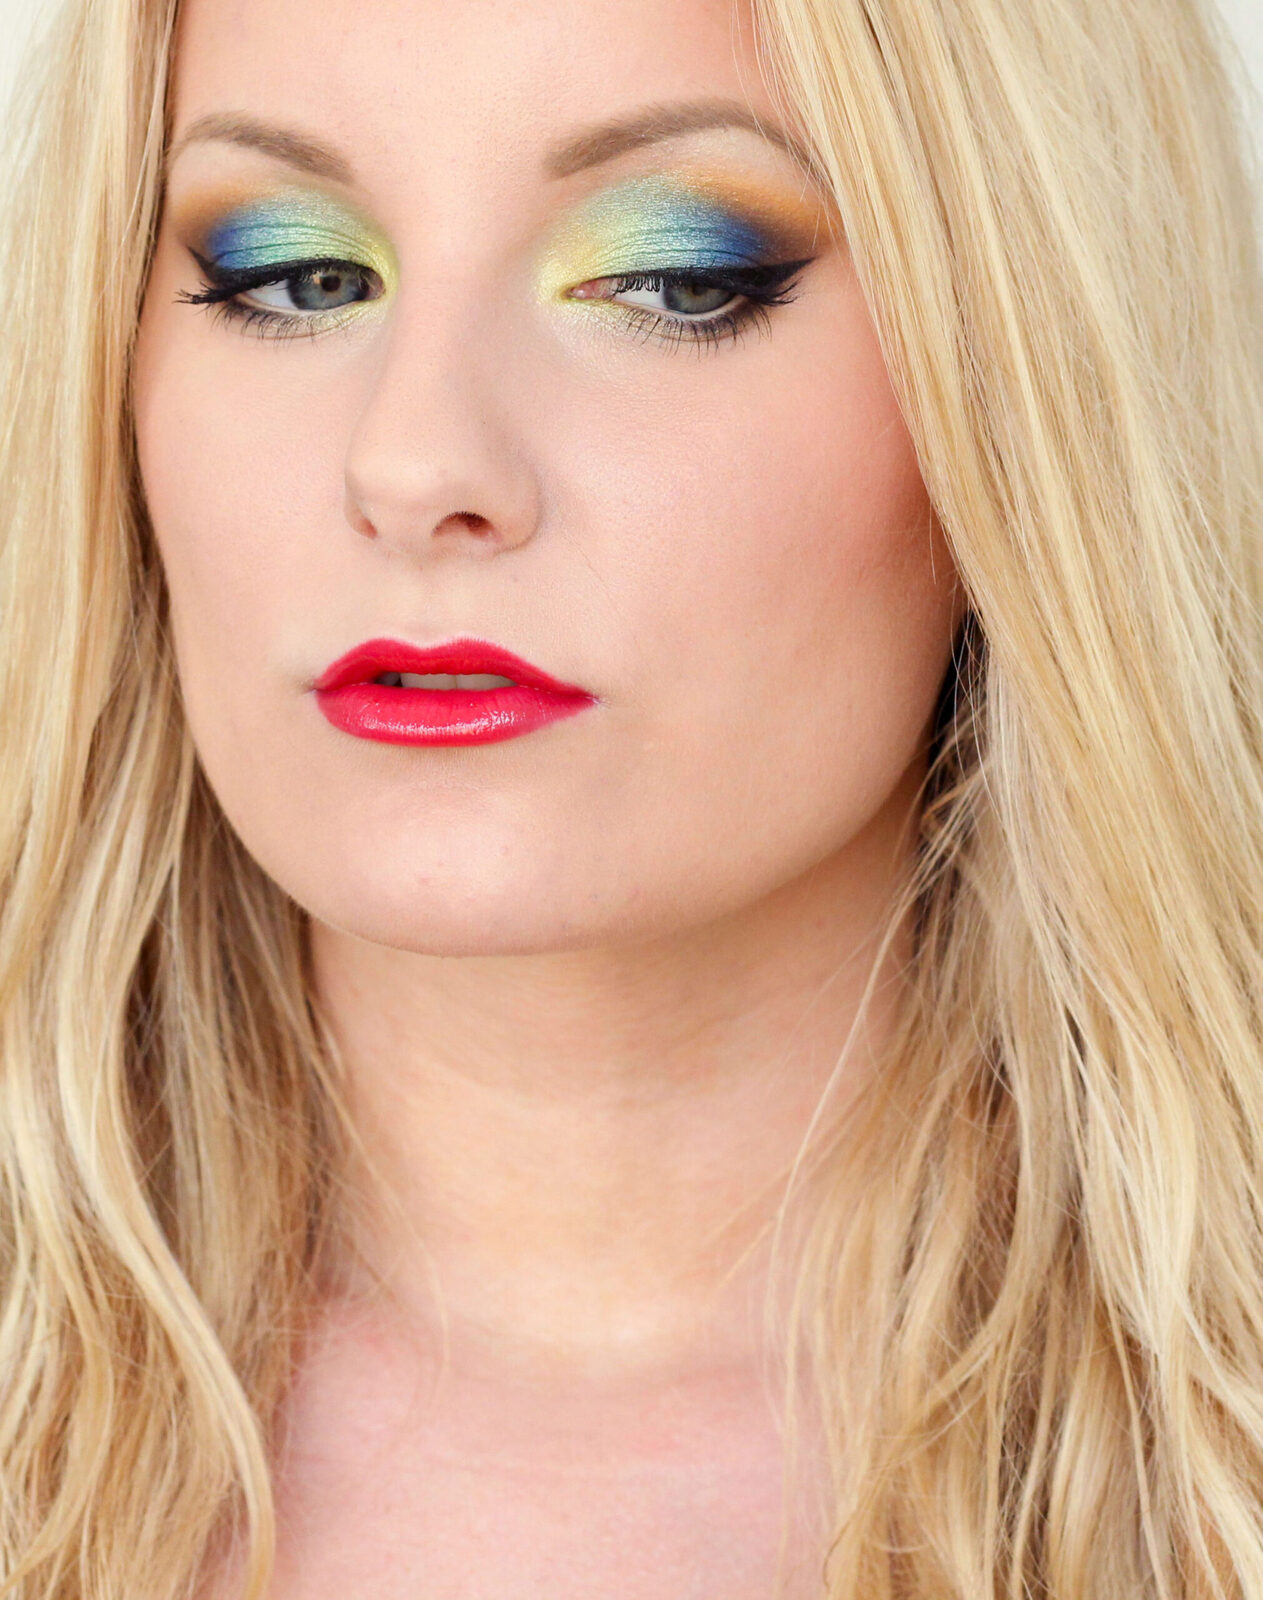
Tropical makeup

8

Today's make-up is extremely colorful and summery - while the brown in it makes it earthy and easy to wear :)

Hope you like it!

IMG_7072_1111

summer make-up-step-by-step

I have used the 40 palette + nudh mineral eye shadow Cacao Brown.

colorful-summer makeup

1. Orange golden eye shadow over the globe line.
2. Brown eye shadow at the end of the eyelid and along the globe line (nudh mineral)
3. Blue eye shadow next to the tip of the eyelid.
4. Turquoise green eye shadow in the middle of the eyelid.
5. Light green eye shadow deepest on the eyelid.
6. Yellow eye shadow innermost on the eyelid and in the corner of the eye.
7. Light eye shadow deepest on the eyelid.
Brown eye shadow at the bottom of the lower lash line (same as before)
8. Fade the edges.
9. Black eyeliner with wing, IsaDora Flex Tip Eyeliner
10. Black mascara on all lashes, Oriflame Master Curl Mascara.

Eyebrows, Anastasia Beverly Hills Dip Brow Pomade (Blonde)

IMG_7034_1111

Lip-gloss, IsaDora Moisturizing Lip Gloss (Lollipop)

IMG_7049_1111

IMG_7054_1111

IMG_7118_1111

IMG_7080_1111

IMG_7129_1111

Now I'm in Uppsala and do test make - up on two brides + a maid that I will put on make - up when they get married this summer. One wedding is already next Saturday, and the other is June 6th.

It is good to take test make-up quite close to the wedding if you get married in the summer, because you change color so quickly in the sun. And lucky as I am, both were able to do the same day, so I do not have to go to Uppsala two different days. Sometimes you have flowed too :)

Have a nice Saturday, nice of you!


NYX High Definition Eye Shadow Base

0

An eyeshadow primer is a must to get a stylish and durable eye makeup. Those of you who have been following me for a while know that I always use Lumene Eye Shadow Primer, and automatically compare all primers I test with it.

I have not tested super many mega primers, but still a lot, most expensive but also cheap brands, and yet I have not found any other primer that I like to work with as much.

But now I have done it !!!  NYX High Definition Eye Shadow Base is completely to my taste! :)

IMG_4973_111

I have nothing negative to say about this, it is both awesome and affordable! :)

It is in the same price range as Lumene, is easy to apply with the help of the applicator that comes with it, and gives a colorful and durable result!

The primer has a thin consistency that is a bit sticky, I usually prefer creamy primers as I find that thin dries so quickly if you do not apply the eyeshadow around the whole eye directly, but NYX primer has its stickiness for a long time and you have no hurry to apply the shadows .

The eye shadows adhere really well to the eyelid thanks to the primer, and they last all day without problems - even hot summer days!

IMG_4980_111

It costs 119 ISK HERE, and they also have free shipping!

IMG_6598

Two happy thumbs up for NYX hd primer in other words! :) An eyeshadow primer that I will no doubt continue to use!


Free Sundays?

15

I am thinking of introducing blog holidays on Sundays this summer.

It was my New Year's promise to have time to schedule posts for every Sunday to get some time off, you get more energy and motivation the rest of the week then! Or if necessary get time for other things that have to be done with the company / webshop and do it on Sundays, without having to sit with it in the evenings.

But instead of stressing with time settings the days before Sunday, I would rather blog on Sunday anyway, so my plan cracked a bit!

So this time of year when everyone is sitting less in front of the computer, I'm thinking of skipping the posts completely on Sundays, so only now during the summer.

Or will you get mad at me then? :) Feel free to come up with opinions!

Yes No Maybe

? :)

Sun kissed - Sun kissed makeup (Step by step)

3

Today's look is a golden bronze, sun-kissed make-up that fits perfectly this hot summer day!

Looks in front of me this make-up with a coral / peach pink dress, nice :)

IMG_6737_111

I have created a sun-kissed complexion with the help of nudh mineral Bronz Mica.

sun kiss makeup


Both shades come from nudh mineral, Rose Gold you will find here and Cacao Brown you will find here!
The golden eye shadow really highlights blue eyes super nice!

IMG_6720

sun-kissed-makeup-tutorial

I must have happened to change places on the 3rd and 4th step, you should of course do picture 4 before picture 3 :)

1. Golden eye shadow deepest on the eyelid.
2. Brown eye shadow at the end of the eyelid and along the globe line.
4. The same brown eye shadow at the bottom of the lower lash line.
3. The same golden eye shadow in the corner of the eye and at the bottom of the lower lash line.
5. Fade out the sharp edges, for a more smoky look.
6. Black eyeliner along the top and bottom of the lower lash line, Shiseido Smoothing Eyeliner Pencil (Black)
Black mascara on all lashes, Master Curl Mascara.

IMG_6734_222


Lip-gloss, nudh mineral Lip Gloss (Bronzy Glam)

IMG_6747_111

IMG_6741_111

IMG_6761_222

Hope you like the post!

Now I will wedge home to Frida and drink coffee, eat fruit and talk shit in the deck chair :)

Have a nice Friday you wonderful!


en_USEnglish