Colored face primer - glo Tinted Primer SPF 30

0

A novelty that I can finally show you is the colored face primer Tinted Primer Spf 30 from glo Skin Beauty which you can buy in my webshop Creativemakeup.se! :)

What is glo Tinted Primer spf 30?
En färgad ansiktsprimer som ger lätt täckning samtidigt som den jämnar ut hudens struktur, så man får både en jämnare hud och en jämnare hudton. Resultatet blir en sammetslen hy och “my skin but better”-effekt. Använd ensam eller under foundation.

What I also like is that it becomes matte, so not dry-matte but it contains no luster. And it holds great on the skin! It is not absorbent or developed for just oily skin but fits very well on me who is very oily.

The sunscreen and paint come from pure minerals.

Skin types
It suits all skin types, is neither absorbent for oily skin nor moisturizing for dry skin, but only neutral.

Several products in the same
I love the primer as a complement to my other base make-up, but above all I think many will like it as a multi-product. If you do not want so much coverage, this is enough, instead of primer - light-covering foundation - powder, you only need this product to achieve the same result, which is smoother skin (which primer is for), smoother skin tone ( which foundation is for) and a matte and durable result (which powder is for). That it also has spf 30 is another bonus!

Application
Massage in with clean fingers, it is super quick and easy! If you want more make-up, apply a thin layer, but if you have the primer all alone but want a little more coverage, you can apply a little thicker layer without it becoming unnatural or cakey.

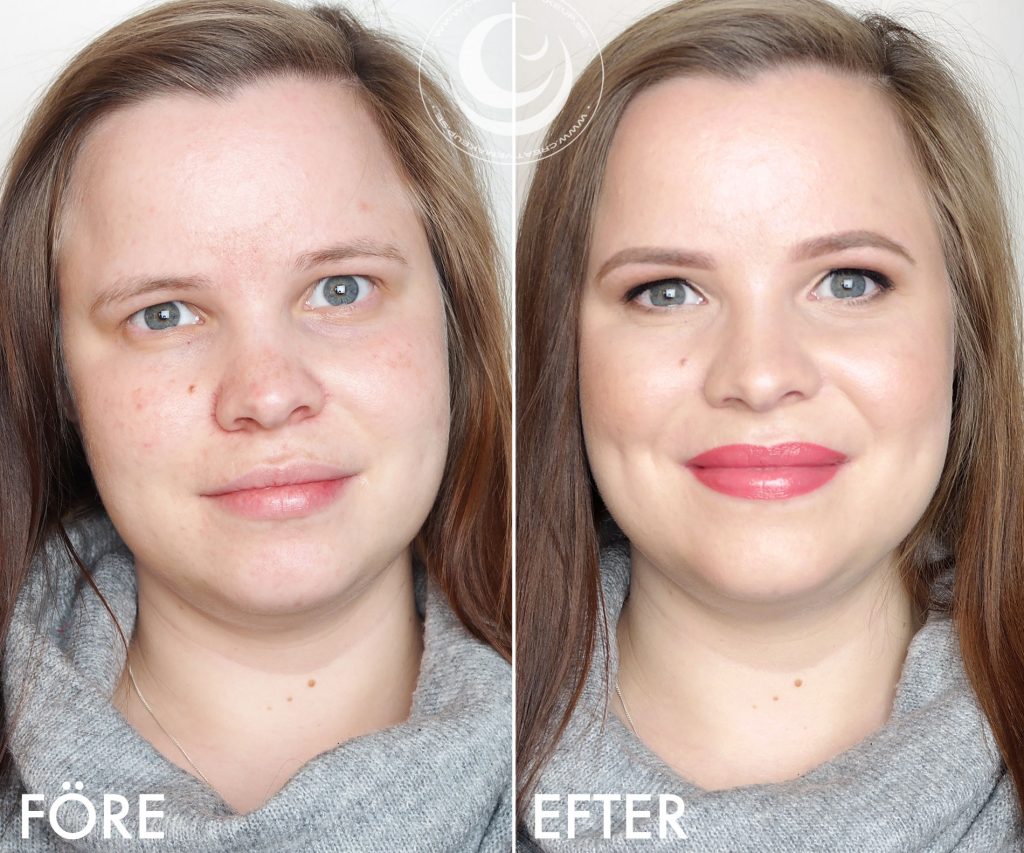
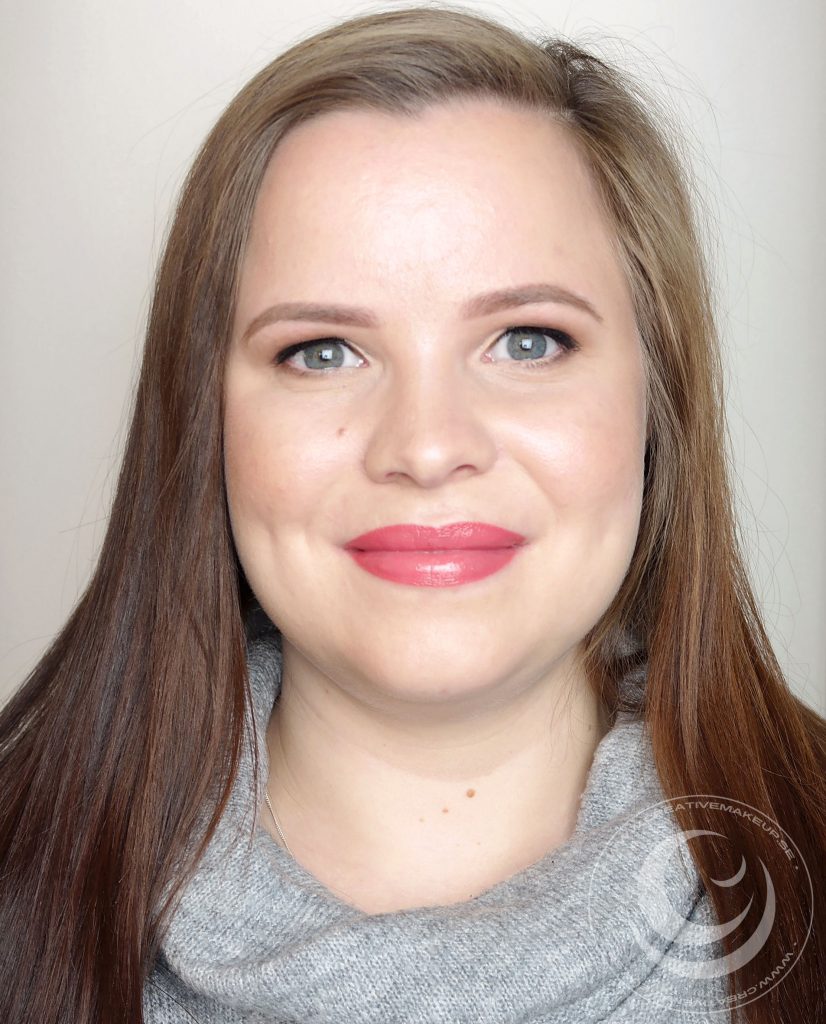
Here you see before and after!

Good summer product!
1. It has sun protection factor 30
2. It has so little coverage that you can easily have it when you want to be completely unmade up otherwise without it looking strange. I dye lashes and eyebrows and then I lubricate with this and you feel super fresh!
3. Many people become naturally shiny in the summer because you get oily on the skin or hot overall, and then it is nice with a matte product! If you want more glow, you can easily add it with higlighter and glow mist (shows it further down in the post)
4. If you want to look a little browner, you can get away with a bit darker shade than you really are because it blends in so naturally and adapts very well to your own skin tone. In the before and after picture above, I have the shade Medium which is too dark but the end result still looks great even in reality.

I will talk about the shades and show more pictures further down, also on the shade Light that suits my skin tone :)

Why coverage in a face primer?
The coverage is weak when compared to a foundation, more like a colored day cream I would say. This means that you can have less foundation (you know that I advocate thin layers of more products than a thick layer of the same), which is extra nice if you, like me, often use mineral foundation. With this primer under your mineral foundation, you do not have to work much with the brush at all to get a perfect result.

Packaging
Another plus on the edge of the packaging - a tube! Hallelujah! I love tubes, hygienic, practical and you can easily squeeze out the last.

Shades
The primer comes in four shades, because the coverage is weak, so you choose based on how light / dark skin tone you have. For example, I can have both Light and Medium, even though solid medium is actually much, much darker than my skin tone if you compare a whole click. I then look a little more tanned than I am, but the result is still natural.

Here you see the four shades Fair, Light, Medium and Dark. As I said, it does not have to be a perfect match as with foundation, but go by how light / dark skin tone you just have.

Gradually
I wrote above that you can use the primer alone or under foundation. And if you use it without foundation, you can either be completely finished like that or you can supplement with eg concealer, blush, etc. and I thought I would show you step by step now!

This is how my skin looks completely without makeup.

Tinted primer all over the face applied with hands, thin layer. As you can see, it gives quite a bit of coverage, but that together with the skin becoming smoother makes the whole whole look much smoother even though it shines through bumps.

Here I have the shade Medium which makes the skin tone a little darker and warmer.

2. The concealer Pixi Pat Away Concealing Base (1 Cream) under the eyes, next to the nose and on blemishes and spots I want more coverage on the face. It is a lighter shade so I get both coverage and lightening.

And then it looks like this later!

And after the highlighter Pixi Glow-Y-Powder (London Luster) and blush Blush (35) so the result looks like this! Natural, glowy and at the same time a very even skin and skin tone. I have also sprayed with Pixi Makeup Fixing Mist but if you want even more glow, you can use Pixi Glow Mist instead, it's so good!

So it turned out as I wrote earlier - the primer is matte but you can easily add glow yourself!

And here you see the difference between having only primer and then adding enlightening concealer, blush and highlighter.

Had I wanted more coverage (which I sometimes want) I would have personally supplemented with the mineral foundation glo Pressed Base Foundation. It takes then superlite of it which is very nice! But you can also use any other foundation of course.

Thicker layers?
In the pictures above, I put a thin layer of primer, but as I wrote, you can apply a little thicker if you do not have foundation over, and I have fixed a before and after picture on it too! And then I have the shade Light:

It is still not one thick lager så klart men lite mer så får man ganska mycket mer täckning! Men det är ändå inte så mycket täckning att man känner att man behöver ha massa rouge och grejer för att inte se ut som ett spöke, utan det blir ändå ett lite mer “osminkat” resultat.

I think I have managed to squeeze in all the info I have about this Tinted Primer now! I really think it's awesome! :)

You can click the primer home in the webshop here!

Shout out if you have any questions ♥

My lip tattoo - To tattoo the lips

2

“Hej Helena! Jag var och fixade mina ögonbryn hos er på Creative Makeup (supernöjd!) och pratade lite med dig i butiken innan och har nu börjat följa din blogg. Du visade mig att du tatuerat läpparna väldigt mycket utanför din egen form på överläppen, och jag undrar om du kan lägga ut före-och efterbilder på din läpptatuering i bloggen? Kram!”

I absolutely can!

Jag har ju tatuera läpparna jättemånga gånger nu eftersom jag alltid ställt upp som testperson för alla lärlingar och även för Annika när hon satt nya verktyg på prov. Så det har inte fäst så bra på mig eftersom det inte är gjort “ordentligt” som man gör på kunder.

Therefore, I have not shown pictures on the lips after the last few times because they were not really finished. But now I have taken pictures after the latest lip tattoo that Olga did on me just a few weeks ago, now the color has stuck everywhere :)

Here is the result of my lip tattoo:

My lip tattoo - To tattoo the lips

Big difference in shape! It is mainly on the sides of the upper lip that it is enlarged.

What lip variant do I have?

Eftersom olika personer har tatuerat mig så går det inte att säga exakt om jag har “intonad kontur” “hela läpparna” eller “3D/ombré” som är de tre varianterna man kan välja på. Alla har gjort lite olika hehe. Men here you can see the difference in what the different variants mean.

How have I changed my lips?

But what I have done is in any case:
1. A very enlarged shape on the sides of my upper lip
2. A pretty pink color so you might think I have a colored lip balm or lipstick on me all the time
A light contour around the entire shape that is tattooed with white border in edge with the tattooed lip contour.

Om man vill få samma resultat som jag har så skulle jag säga att man bokar “Ombré/3D” samt “tillägg highlighter kontur” och så kan man visa mina bilder och säga “ungefär så här vill jag ha” :)

Why do I have to tattoo my lips?

Mostly because it's fun! I work with this :) And I love to have a lot of color on the lips, but when the upper lip was so small and fluffy, the lip color was barely visible. But I think my little plut lip before is very cute too!

The most common reason, however, is that you want a sharper contour, correct asymmetry or have a more fun color. There are lots of colors to choose from and you can also match your own lip color if you do not want a color change.

My lip tattoo - To tattoo the lips before and after

Aftercare - How do you take care of the lip tattoo afterwards?

During healing, you lubricate morning and evening and possibly. sometime in the middle of the day if you feel you have to, but it should not be constantly wet because it becomes like a scab on the lips and if it is too moisturized, it just becomes a gag, and you do not want that. And after a few days (takes different lengths of time 2-5 days I would say) the crusts come loose. The color is a little sharper immediately after the crust is released as well, I would say that you can judge the final color after 2 weeks.

When the lip tattoo is completely finished, you should always use sunscreen when you are in the sun for the tattoo to last as long as possible. I also need to thread the upper lip regularly (which you see I do not done in the pictures in this post hehe) because otherwise I have small scaly hairs on my lips because it is actually my normal skin that we have tattooed on :) This of course only applies to people who have tattooed far out of shape.

My lip tattoo - To tattoo the lips

This is what it looks like in profile!

natural lips with lip tattoo

Summaries:

And this is what it looks like when I smile and am completely unmade up. I think all my tattoos are nice even when I am unmade, they make you look fit and fixed but do not become too much when you e.g. do not have foundation and mascara.

Hope you liked the post about my lip tattoo! If you have any questions about lip tattoo or permanent makeup in general, shout out! It is also possible to read more info and book time online on our website Creativemakeup.se.

Also read:

Hugs are! ♥

Summery lips on makeup customer

1

I made up this customer last Saturday! A fairly natural eye makeup but the well-shaped eyebrows and the incredibly nice, summery lip color really became the finishing touch to the whole look! :)

Here is the result:

BASE:
Face primer - Pixi Flawless & poreless primer
Foundation - Pixi H2O Skintint (1 Cream)
Concealer - Pixi Pat Away Concealing base (1 Cream)
Powder that neutralizes redness - glo Redness Relief Powder
Contouring & matt highlighter - Contouring Palette (No. 2)
Luminous highlighter - Pixi Glow-Y-Powder (London Luster)
Rouge - glo Skin Beauty Blush (Papaya)
Fixing mist - Pixi makeup fixing mist

EYEBROW:
Brynpenna - glo Skin Beauty Miro brow liner (Dark Brown)

EYES:
Eyeshadow Primer - Pixi eye bright primer
Eyeshadows - glo Shadow Quad (Bon Voyage)
Light eyeliner along the waterline - gloMinerals Eye Pencil (Peach)
Eyeliner - Kryolan HD Cream Liner (Ebony)
Mascara - Magnetic lash mascara

LIPS:
Lip pencil in the contours - glo Lip Pencil (Coral crush)
Lip Gloss - glo Lipgloss (Flamingo)

I really like the glossy summer lips! :)

If you also want to book makeup with us at Creative Makeup in Uppsala, you can easily do it online here, or call us (between 10-18) on 018 10 50 13.

Hugs are!

My business week v. 16

1

Good morning Sunday!

The sun is shining and I am very happy with the week that has been :)

Our Spain plans have received a push!
I have mentioned before that we want to live in Spain and work remotely, last week I also wrote that we had just got the idea to start a salon in Spain as well!

In normal cases, I do not usually go out with all our ideas before something is nailed down, but it can be a fun follow-up, I think, that you have been the only one since we hatched the idea and started dreaming as well :)

The update on the subject is that the law of attraction or the universe seems to like this idea!

1. On Monday I spoke to a customer who has lived in Spain (in different places) and said that Fuengirola is the best place to have the salon and that the best accommodation (for our wishes) is in Mijas Costa which is just outside. In Fuengirola, there is a great demand for Swedish services and from what she knew, there are not many beauty salons there either. I had never heard of Fuengirola before, we have mostly watched Malaga and Nerja :)

2. I torsdags började jag snicksnacka med en annan kund som satt i väntrummet medan jag servade med kaffe, gav bedövning (inför bryntatuering) m.m och efter en stund berättade hon att hon köpt hus i Spanien, “var i Spanien?” frågade jag, “vet du var Fuengirola ligger?” sa hon. Jaa! Och vet ni? Hon hade precis köpt hus i Mijas Costa! Fick se massa bilder och filmer :) Hon sa att vi kommer få massor att göra om vi har salong där!

3. Kunden som har bott i Spanien tidigare mailade mig med tips på en frisörsalong i Fuengirola som jag kunde kontakta, för hon har säkert koll på hur stor efterfrågan är. I samma veva pratade jag och Annika om att man kanska ska börja med att Annika hyr ett rum bara och kolla läget innan vi smäller upp en hel salong, fixar boende till oss och personal m.m. Och vet ni vad frisören svarar? “Jag har ett ledigt rum som jag letar hyresgäst till!” :)

Annika and this hairdresser have not had time to talk yet, so it may not be relevant anyway when we know more details. But still fun that the ball is rolling!

This is how I feel when I stay for exalted, if you can be! Then there will be staring, psychic smile and the brain wants me to run in several different directions at the same time haha :)

A productive week
Den här veckan har jag bara haft 7st kunder och inga “avbrott” i arbetsdagen så jag har fått riktigt mycket gjort!

Among other things, last week was not very productive with blog posts, but this week I have blogged every single day and am also finished with tomorrow's blog post! Nice start to the week :)

Among other things, I have worked from home in the make-up studio, made a beauty guide post to the webshop with swatch pictures on one of our eyebrow pencils. I have worked with the campaign pictures for May, event planning for our summer event (including goodiebags planning), rowed the schedule for the summer when one of our makeup artists is unfortunately on long-term sick leave :( and looked for a hair stylist who can help us this summer, decided and ordered a fun news for the webshop, fixed with before and after pictures for the salon's social media.

Alltså en hel del olika grejer, men mest roliga saker! Och så har jag stått lite extra mycket i receptionen på salongen också, men allt sånt “vardags-göra” känns inte så roligt att återberätta tänker jag :)

I have also tested a possible future eyebrow treatment - henna eyebrows! Have any of you tested or heard of it? I ran into it by chance and think it sounds crazy interesting!

So it's like a tan that also colors the skin! So you get a more make-up result. It stays on the skin for up to 2 weeks, if you have very oily skin, the durability will be much shorter, however.

I am very happy with the first try! Was a little scared only the first time so I did not let it sit for very long and took a very faint color in the inner edges, so will experiment a little more this weekend, I thought.

Would you like to do the treatment? :)

I have some straw + eyebrow tattoo so it is a bit difficult to assess the durability exactly. So I tested on the arm too! It still shows color and then I even took a bath in the bathtub :)

But there is a process left before we can decide whether to start with this or not. Try all the different colors and shades, test on different people, gain experience about durability, etc. But my hope (and first impression) is that it will work gallantly and that we can start doing the treatment at the salon during the summer!

But it can just as well be a flop and that we do not start with it at all, or find another brand or whatever. Continuation simply follows.

Take advantage of the commuting time
I live in Gimo which is 50 km from Uppsala = about 2 hours travel time a day depending on whether we travel by car or bus.

I try to be good at taking advantage of that time, so that you do not waste 2 hours every day! And that does not mean that I should always be as productive as when I work in the office (but sometimes I am) because I get nauseous easily if I sit and look down at my computer for so long. The mobile phone is lighter because you do not have it in your lap in the same way.

T.ex. brukar jag och Miska ha inspirerande samtal om framtiden – också jätteviktigt för utvecklingen! Eller så har vi “möten” om saker som behöver fixas direkt eller diskuterar arbetsdagen. Ibland brukar jag göra sånt jobb som jag aldrig prioriterar annars så som leta inspiration och kolla trender på instagram så att man t.ex. kan hitta nya behandlingar, t.ex. henna-ögonbryn ;)

Det jag vill säga är att man måste tänka på effektiviteten! Och att vara effektiv behöver inte betyda “jobba superfokuserat” för det är ändå svårt när man sitter på en buss och liknande, utan för mig betyder det att man ska ta vara på tiden och inte bara slösa bort det på att “sitta och ha tråkigt”. Två timmar om dagen blir så extremt mycket tid på ett helt år!

Or I take pictures of my make-up and post them on my Insta Story, like this picture I posted last Thursday;)

If you knew you were not going to fail, what would you do?
När jag sminkade mig här om dagen så lyssnade jag på Framgångspodden och senaste avsnittet med Kjell Enhager. Då sa dom meningen “Om du visste att du inte skulle misslyckas, vad skulle du gjort då?” och det kändes så extremt träffande. Förutom Spanien-planerna så har vi en del andra idéer som jag ser mig själv jobba med i framtiden och det är jätteviktigt att inte tänka “jag kan inte” eller “jag vågar inte” och diverse “tänk om-tankar”.

I myself am not at all particularly afraid of actually failing. I would rather fail at something I have enjoyed doing than succeed at something I find boring. But it's a great idea to keep in mind and dare to ask yourself that question!

Do it to yourselves, if you knew you would not fail, what would you have done then? And then you just do it! :)

Hugs are! ♥


Rainbow makeup tutorial

0

Hi jump! :)

I got very positive feedback when I did sooting with a small rainbow in the corner of the eye last week, so I was inspired for another rainbow make-up!

Hope you like this one too, I got compliments for it from the customers at the salon anyway! :)

Face primer - Paese Makeup Base (Matte)
Foundation -
gloMinerals Pressed Base Foundation (Golden Medium)
Concealer -
Pixi Pat Away Concealing Base (1 Cream)
Contouring - Contouring Palette (2)
Glowy highlighter - Pixi Glow-Y-Powder (London Luster)
Powder - Paese Bamboo Silk Powder
Rouge - Blush (35)
Fixing Mist - Pixi Makeup Fixing Mist

Brynpenna - glo Skin Beauty Micro Brow Liner (Dark brown)

Bright lipstick over - Paese Liquid Lipstick (700)
I have a little lip balm before the lipstick, which is why the lips look a little glossy even though the lipstick is matte.

Applying colorful eye shadows under the eye is a good make-up tip when you want a lot of color but do not have much time. Putting these next to each other and fading out went really fast! On the other hand, doing a whole make-up on the eyelid takes much longer to get nice :)

I put a little light and light brown on the eyelid also to get some balance, not just have everything on the underside because it can be difficult to feel comfortable in. But the little on the top made a big difference to the whole thing I think!

All eye shadows are Paese NEO Eyeshadow.

  1. Black eyeliner with wing, Kryolan Cake Liner (Black)
  2. Eyeshadow primer Pixi eye bright primer
    Yellow eye shadow In the corner of the eye
  3. Turquoise eye shadow at the bottom of the lower lash line (it is greener than it actually is in these pictures because it mixes with the yellow)
  4. Blue eye shadow next to the turquoise
  5. Purple pink eye shadow next to the blue
  6. Red eye shadow at the bottom of the lower lash line
  7. Orange eye shadow under the eyeliner wing
  8. Light shade on the eyelid and over the eyeliner and light brown along the globe line, the contouring palette (same as in the face) Contouring Palette (2)
  9. Turkos “mascara” on the lower lashes, it is the turquoise eye shadow mixed with the liquid Kryolan Cake Liner Sealer
    Black mascara on the lashes, Magnetic lash mascara

Clear!

Hugs are! ♥

en_USEnglish