

Here are step by step how to shape your brows and fill them in! The tips work regardless of what style you want on your eyebrow (wide, bright, sharp, fluffy, etc.) and which product you choose to use.
I like my eyebrows quite narrow and to fill in with a pencil with good precision in a fairly light color so that I can make them well-shaped without it looking hard :) But everyone can read the tips no matter what style you like!

There are certain guidelines when shaping the eyebrows that most people have seen at some point, how to measure where the eyebrows should start / end and where the highest point should be.
I usually rarely use these guidelines because it still does not say much about the actual shape of the eyebrows - and it is the one that most people want help with.
Först vill jag understryka att det finns inget “ska”, man får göra precis som man vill, detta är bara tips på hur man kan få till det! :)
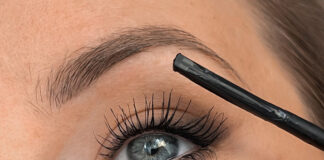
The pen I use in the post is glo Skin Beauty Micro Browliner (adlink) in the shade Light Brown.

1. Start with the underside
Jag brukar börja med undersidan av brynet för att få en “sammanhängande bas” som jag utgår från sen.
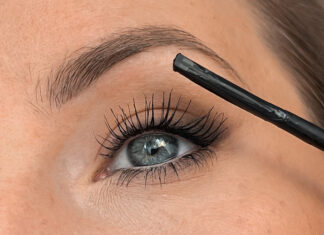
- Work sideways but the pen (or brush, whatever you use now)
- Make a line from the start of the brow to the highest point.
- Var lätt på handen, jag drar inte ett streck direkt utan “skissar fram” med flera drag med pennan.
- Linjen gör jag i en rak vinkel och snett uppåt, jag följer brynets egen form men ser till så att jag inte gör en “kulle”. Blir denna linje böjd så kan man se lite förvånad ut.

- When you have reached the highest point of the brow, continue in a softer shape down to the outer edge.
- I follow the brow's own shape
- Do not pull further than the inner edge is. If the shape goes down a lot at the outer edge, you can look a little sad.
Symmetry tips! Do this on both brows before proceeding to the next step. Fill in the underside and check the symmetry. It is much easier than making one eyebrow completely finished and then you should try to make the other look the same.
Det gör inget om undersidan är lite skarp, det är i innerkanten och på ovansidan av brynet du behöver vara mer försiktig så att inte hela brynet ser “målat” ut.

2. The inner edge
From now on, I always work in the same direction as the straws grow!
- Place the pencil on the line you painted at the bottom edge and fill in the start of the brow by drawing with the pencil upwards.
- Be light on the hand, rather draw many light strokes with the pen than get hard ones.
- Då får du en mjuk start på brynet, inte en “hård fyrkant” som är lätt hänt annars.

3. Top & highest point
The dotted area shows that I make the top at the same angle as the bottom so that the shape is a little wide all the way up to the highest point.
Why? For several reasons:
1. Most people want a brow shape that lifts the eye, but if you make the brow narrower even before the highest point, you will not really get that effect.
2. If this angle is bent downwards instead of straight, you can look a little skeptical / bitchy. Which in itself is pretty cool I can think;)
Many people forget to mark the highest point otherwise! You narrow down before and start on the downward outer edge too early, which makes the brow quite straight or gets a sad shape - it's not wrong either, but do you want a shape that lifts gaze, you will not get the desired effect.
- For me, the straws on the top grow downwards
- I therefore work from top to bottom with the pen, several small light strokes down
- I make the shape obliquely upwards at a right angle, without making a full line as on the underside
- I paint all the way up to the highest point, where the brow starts to go down

The outer edge
Sen är det bara det som är kvar på ytterkanten! Du har redan fyllt i undersidan samt ovansidan upp till högsta punkten, så det är bara att “binda ihop” formen från yttersatsen och upp till högsta punkten.
I constantly fill in more where I have fewer straws, on some customers I do not fill in the middle of the brow at all (where you usually have the most straws) then you get as natural a result as possible!

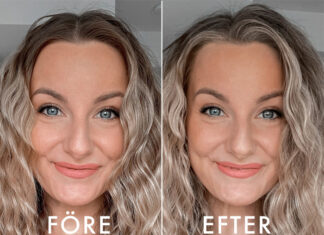
I have some remnants left of my brow tattoo but now it's probably 4 years since I did it so it really needs to be refilled. But it's good then I can take the opportunity to shoot eyebrow tutorials for so long haha.
Hope the tips were helpful :) Hugs to you!
Also read:
- Pick different eyebrow shapes (Guide)
- Wider eyebrows with brow lift + serum
- All about Brow Lift! & #8211; (Brow Lamination / Browlift)




 English
  Swedish
  Spanish
Just what I needed right now! 😊